Welcome To Our Library
The current custodian is Pete Miller and he can be reached via e:mail at
quackers1034@blomand.net. If you have any questions concerning the
process of getting a CD please drop him an e:mail.
Carvers Corner
Carving Seminars
We will hold the first seminar in late September. It will be
taught by Blue Pau, a member of our Wood Club and the topic
will be carving a half-scale mallard duck that could either
be carved with modest detail as a decoy or with fine detail
like most of Blue's bird carvings.
The second seminar is planned for late January and will be
taught by Adina Huckins, an accomplished Arkansas carver.
Details about both seminars will be released soon in order
to get attendance commitments from club members.
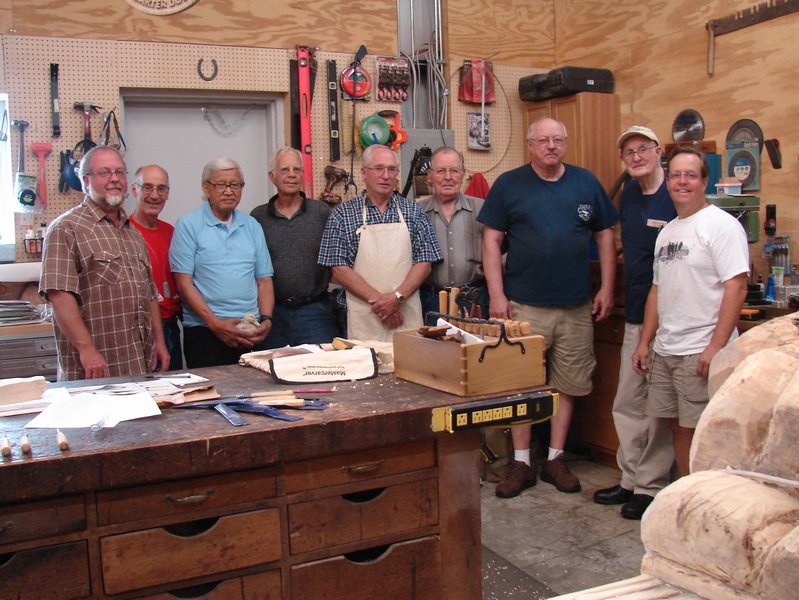
The attached photos are of recent Wood Club member carving
projects.
The carvers are continuing to meet twice a
month on the first and third Saturday's of the month from 8:30 am to
10:30 am at at Jim Jolliffe's shop, located at Jolliffe Acres Lane,
Tullahoma, TN.
NAME TAG INFORMATION
If you are a recent new member or had requested
a new name tag, a box of name tags will be available at the next
meeting. In the
future, name tags will be made for new members and available for pickup
at the next regular monthly meeting. Name tags for other
members will be made upon request only and will also be available for
pickup at the next meeting. Please contact Chuck Taylor (931-728-7086 or email
taylor_cw@charter.net) for information or name tags.
 |
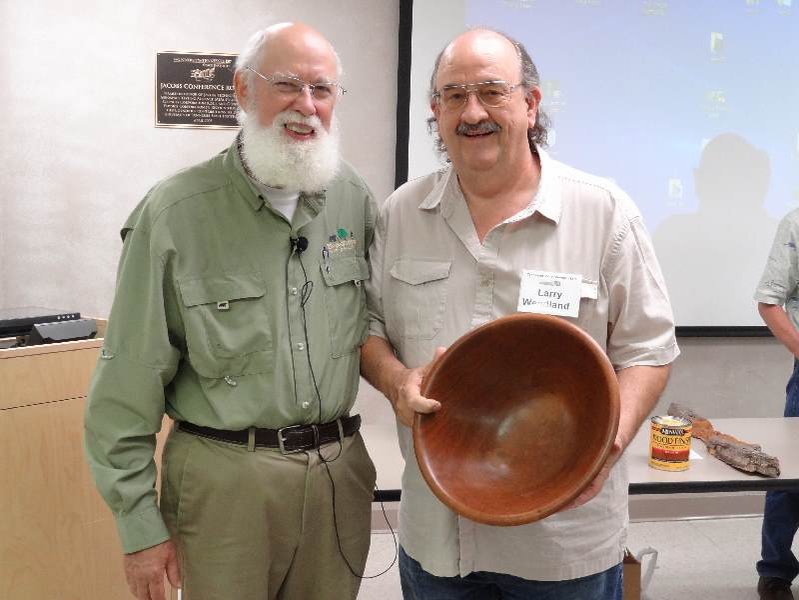
Gary Bennett brought a large Cherry bowl. He also
brought 2 segmented bowls of Cedar and a covered segmented
jar made with gun stock plywood. All finished with tung oil. |
 |
Judy Bennett had an
intarsia flower wreath of 138 pcs made of poplar,
cypress, and walnut. Judy also had a
intarsia of a Lab dog of walnut and blackened with
vinegar and steel wool. Finish spray poly. |

|
Doug Dunlap showed a pretty
bowl of yellow poplar burl, finished with 3 coats spray
lacquer. He showed
3 smaller natural edge bowls finished with spray
lacquer. |
 |
Jim Jolliffe had a carving of a
wood spirit of cottonwood bark from Nebraska. Natural
finish. |

|
Mickey Knowles brought a
stained-glass lamp finished using a red oak penetrating
stain and spray polyurethane. Also had an unfinished lamp
frame from Tom Cowan. |
 |
Jim Acord showed pics of
shoe caddy and coat rack made for home entrance. Made of
red oak with golden oak stain and poly finish. |
 |
Matt Brothers showed pics of Collins Roan's
queen size bed he made of cherry with lacquer finish.
Doyle McConnell explained how Collins turned pieces and his
equipment. Collins was not able to attend. |
LINKS OF INTEREST
To view the "Links of Interest" on our web site, please click
here.
Click
here to see the Exchange Opportunities
If you have additional woodworking items for sale or are looking for woodworking
items, please send information to Chuck Taylor at 931-728-7086 or email
to taylor_cw@charter.net .
Notes
Kenneth (Dale) Daniel will sharpen TVW member blades. His location is 2007 Ovoca Road,
Tullahoma.
Phone –
931-455-5024, cell – 931-247-4753.
Shop Tip
Mystery Markings on Tape Measures
No, it’s not a plot to confuse us - maybe
Test and photos by Tom Hintz
Posted - 8-24-2011
While there may be few woodworkers (or metalworkers) that will ever
frame out a house, knowing about these previously mysterious tape
measure markings can come in handy. Ever try to locate studs on a
wall only to discover that they are not on 16” centers? If you know
about these other markings you know where to look for the next stud
and why it might be at that distance. If you get roped into
(volunteer for the married folks) building a potting shed knowing
these alternative stud spacings just might come in handy. If nothing
else you might be able to win a beer or something at the next club
meeting.
Tape measures seem like very basic tools, perhaps even simplistic.
But then we discover little black diamonds and other seeming
unrelated symbols or color changes and our basic tape measure takes
on an air of mystery. Many people simply disregard everything but
the regular numbers thinking that if they needed the other markings
they would already know what they represent. I think that if you
know what those “other” markings mean you just might recognize use
for them.
Regular Scale
Nearly all tape measures have the normal sequence of numbers along
at least one edge of the tape. Some will have one resolution along
one edge and another resolution on the other edge. Often you find
1/16” markings along one edge and 1/32” markings on the other. Some
will have a “standard” (Imperial) scale along one edge and a metric
scale along the other. You’d think that being able to see the metric
equivalent every time we measured something that eventually we’d
learn the metric system like everyone else in the world. Don’t hold
your breath.
 |
|
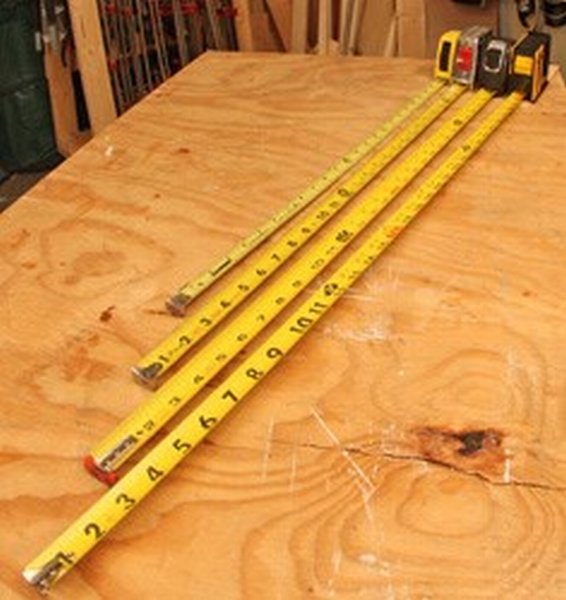
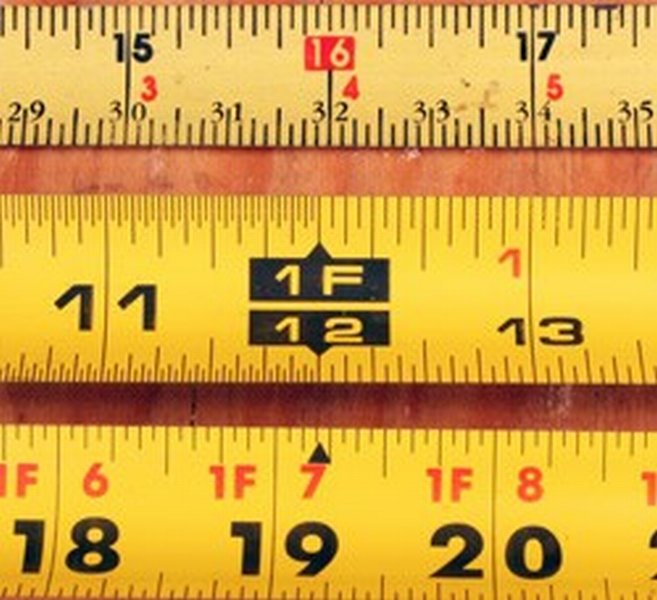
All of these measuring tapes (left) have similar marking schemes
though the graphics used can vary slightly. In this photo (right) we
see the mysterious Black Diamond on the bottom, a simple foot
indicator in the middle and a 16" mark on top. Your tapes will
probably have something approximating all of these.
My favorite tape measure has a regular scale long the top edge of
the tape and ½-scale centering markings along the other. If we
measure an 18”-wide piece and find 18” on the lower scale and that
indicates the center of that piece. Very fast and easy, two things I
like a lot.
Standard tape scales usually have some kind of noticeable marking at
1-foot intervals. I think they do that to provide sort of a coarse
scale that we can see easily when doing layouts. Once we get to the
nearest foot indicator finding and making a layout mark at the exact
distance is a bit faster.
Eight-Foot Spaces
Many tape measures add red numbers (or some other graphical
standout) every 16-inches, a very common spacing for studs in house
framing. This spacing allows for six supports in each 8-foot length.
There may also be a color change or graphical identifier at 24-inch
intervals that provides four supports in that same 8-foot length.
While 16” spacing is standard for studs in low weight situations
some building codes allow studs spaced 24” on center which can save
a bit of money because fewer studs are needed. But full plywood
sheets can still be used without cutting. Both of these spacing’s
allow installing 8-foot-long sheets of plywood without cutting.
A standard concrete block chimney is two bricks by two bricks or
roughly 16 inches square. That chimney won’t fit between studs that
are installed on 16”-centers because there is only 14-1/2” between
the studs. However, "Black Diamond Spacing" is ideal because the
space between studs at that spacing is 17.7”. There is another use
for the Black Diamond spacing as we will see later.
 |
|
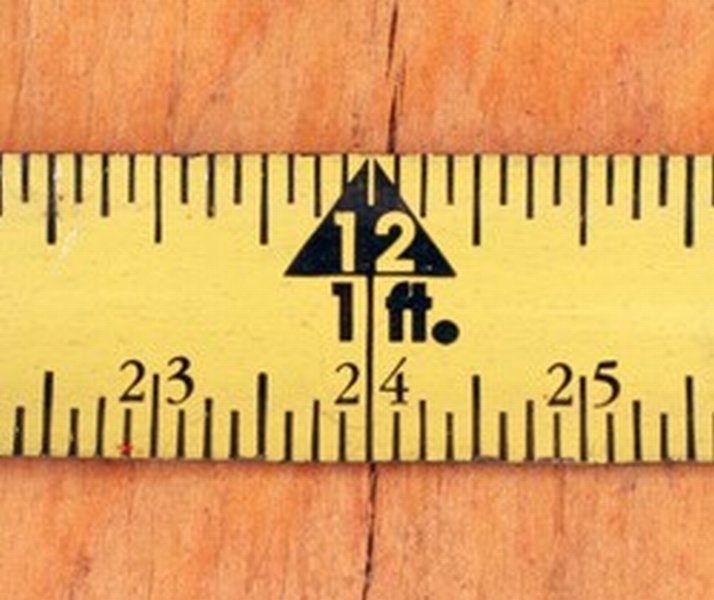
On the left is my daily use tape measure. Note the 1/2 scale along
the bottom edge. That lets me find the center of a piece very
quickly. In this case, find the 12 on the lower scale that is the
center of a 12" board. Many time the sizes are not so simple and
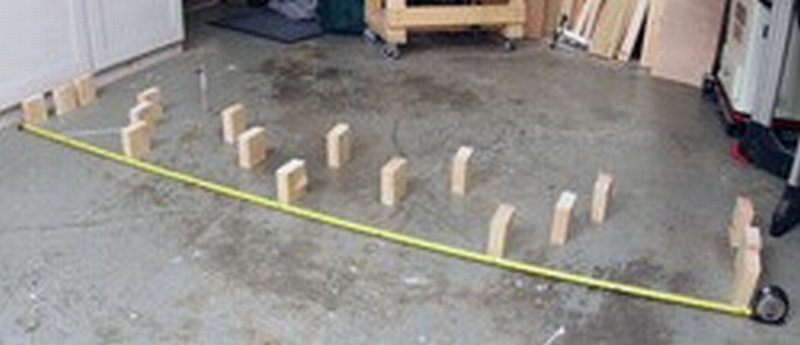
that lower scale saves the day. I have laid out an 8-foot-long wall
(right) using the 16" marks (rear), Black Diamonds (middle) and 24"
marks (front) to space the studs.
Six supports can fit into an 8-foot space with 16” spacing while 24
inch spacing provides four supports in the same space. What if the
load being supported requires that the trusses be spaced halfway
between 16 inches and 24 inches? If they were spaced at 20 inches,
they would not come out even at 96 inches. But there is an answer
for this. Read on.
Black Diamonds
Probably the one tape measure marking that is most mysterious to the
most people are the black diamonds. If you divide the 8-foot space
we have been using by 5 we get a spacing of 19.2”. The black
diamonds on the tape measure represent that spacing. The first black
diamond is at 19.2” and after that black diamonds appear at 38.4”,
57.6”, 76.8” and 96”, or 8-feet. That is one less stud for every
8-feet of wall, counting the beginning and end studs.
While the black diamond spacing is nearly as weight capable as
16-inch-centers building codes may not allow it in all situations.
Also, the black diamond spacing does not place a stud at 48-inches
so standard 8-foot sheets of plywood must be installed with the long
dimension horizontal.

Work safely and don’t take unnecessary chances
with your woodworking tools
Always wear your
safety glasses in the shop
Want a good tip concerning your current project?
DISCOUNT OPPORTUNITY:
Jack Kincella has secured Builders Supply
in Tullahoma as a new club sponsor and they will be giving all club
members a 5% discount on ALL purchases in their store. This does not
include the old Hawks hardware. All members need to do is show their
name card and it is setup in the computer to get the discount.
The following companies are supporters of the TVW club. Click on
their "logo" to go to their web site.


