SPLINTERS
Tennessee Valley Woodworkers
 Vol. 17/ Issue
10 October
2002 Editor: Tom
Gillard Jr.

Meeting Notice:
The
next meeting of the TN Valley Woodworkers
Will be held, October 15th, at
7:00 p.m. in the
Duck River Electric Building, Dechard, TN
All
interested woodworkers are invited!


The following people have
agreed to serve as contacts for their particular skills. If you have
questions, suggestions for activities, or other comments relating to these
skills, please call these folks. Their interest is to help the club better
serve their area of expertise. Your participation with them will help them
achieve that goal.
Alice Berry
454-3815
Design
Phil
Bishop
967-4626 Finishing
Tom Church
967-4460
Turning
Harry
May
962-0215 Carving
Bob Reese
728-7974
Sharpening
Ross
Roepke
455-9140 Joinery
Maurice Ryan 962-1555 Health and Safety
List of Club
Officers
President: Bob Leonard
V. President: Doyle McConnell
Secretary: Barbara Keen
Treasurer: Henry Davis
Publicity: Maurice & Ruth Ryan
Newsletter Editor: Tom Gillard Jr.
GOD BLESS AMERICA!

CALENDAR of EVENTS
The Fall Seminar on Joinery
Ken Gould announced that the fall
seminar will be October 19th at Dean Lute’s Shop. (Maps available at meeting)
It will be on joinery and the agenda is:
8:00 A. M. coffee, 8:30
measurements and layouts,
9:00 Dean will demonstrate machine mortises,
after lunch John will show how to do a segmented bowl,
Dave Whyte will
demonstrate how to make box joints and
Tom Cowan will demonstrate how to
make hand made dove tails.
Andy will demonstrate his sawmill and the seminar
should be over between 3:30 –
4:00. COST:$ 20.00
The October meeting program will be presented by Harry
May. Carving will be the subject of the meeting.
Elections are coming up
soon!If the nominating committee calls you and asks you to
serve, PLEASE consider it. They wouldn't have asked you if they didn't
believe you would do a good job.
Bandsaw Resawing Guide
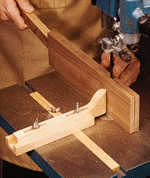
This resawing guide lets you correct for blade
drift, and you can build it from parts you probably have lying around your shop.
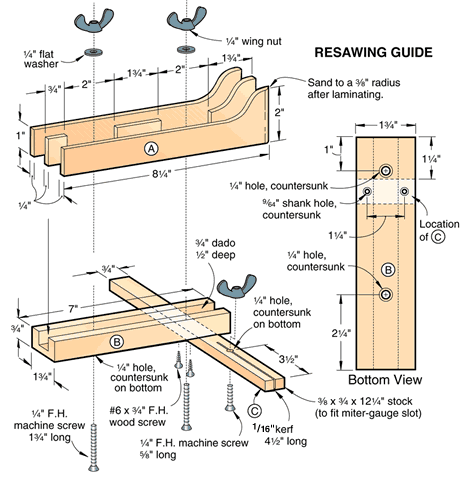
After struggling with his bandsaw fence, blocks, clamps, and a resaw
guide, WOOD® magazine reader John Hodges of Kaufman, Texas, decided to design
his own bandsaw resawing guide. You can build one just like it by gathering up
some scrap stock and following the illustrations below. To use this
guide, first mark a line along the top edge of the piece to be resawn. Adjust
the center portion of the jig (A) until the bandsaw blade aligns with the marked
line on the wood. Tighten the wing nuts that hold A securely to B.
Tighten the wing nut in part C to secure it in the miter-gauge slot.
Because few bandsaw blades track perfectly straight (making a fence
almost useless for resawing), the curved end of part A allows you to steer the
board into the bandsaw blade and make adjustments to follow your marked
line. We recommend using a 1/2"- to 3/4"-wide skip-tooth or hook-tooth
blade for cleaner cuts. And, always use a pushstick for safety when resawing on
a bandsaw.
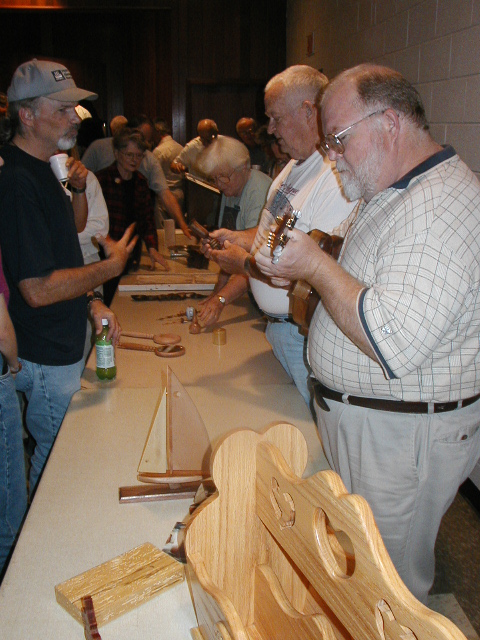
SHOW AND TELL:Dave Whyte brought in a Walnut jig
to facilitate laminating wood on the end grain of plywood.
Henry
Davis showed us a couple of pieces of spalted wood that he glued to plywood
to enable him to plane the spalted wood with out it splitting or buckling.
John Green brought in a love spoon from Wales. It was carved
out of English cedar and the fellow he bought it from makes these spoons full
time. He uses a scroll saw to cut out the pattern and power tools for the
carving.
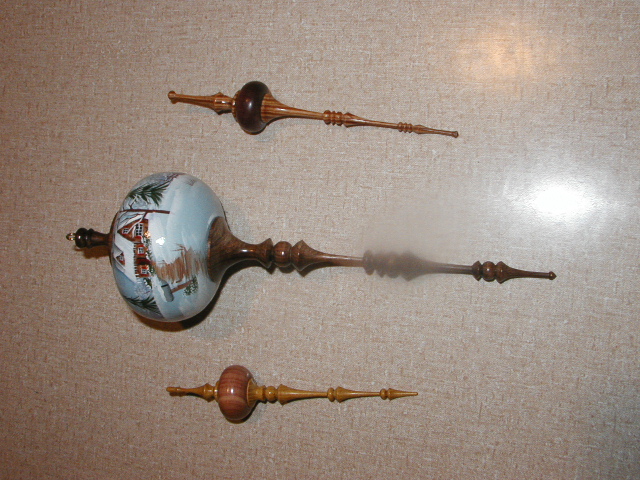
Steve Shores showed a Christmas ornament that had been
turned and painted and two miniature ornaments. He also showed a
ring holder and a couple of boxes.
John Mayberry made two hand
mirrors that he turned. They were made out of Cherry wood and handles were
glued on with CA glue.
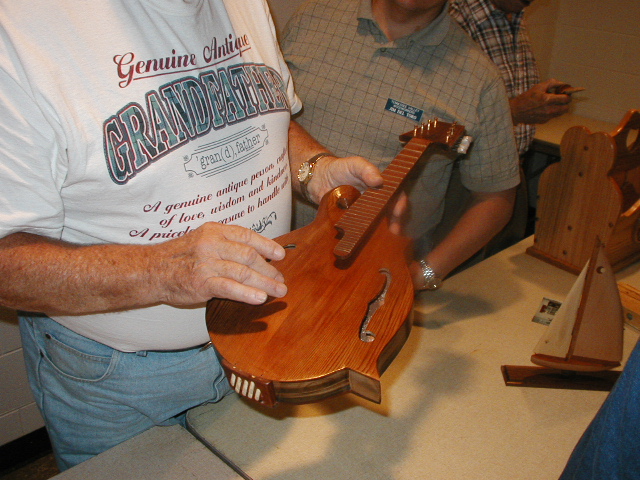
Bob Bestweather, a guest, brought in a
Mandolin that he made out of Western Red Cedar for the top and African mahogany
and popular for the bottom. He said he did 80% of work with a Dremel tool
and rest with either band saw or scroll saw. He used an oil finish.
Bob Reese made a ringed goblet. He asked what type of wood the
club thought it was. He said his son thought it was Tung wood from
Florida.
Tom Gillard brought in two model sail boats he had made and
also a box made out of very wormy maple.
Jim Van Cleave showed a
Lietz carbide saw blade that he had bought through Tom Gillard. He hit a
screw when he was using it and it chipped a couple of teeth. It still cuts
very well and he showed some wood he had cut after blade hit screw.
Jim
Parker’s daughter moved to Georgia and needed an entertainment center which
he built out of pine. It took him 4 weeks to build it and he brought in
the pictures of it.
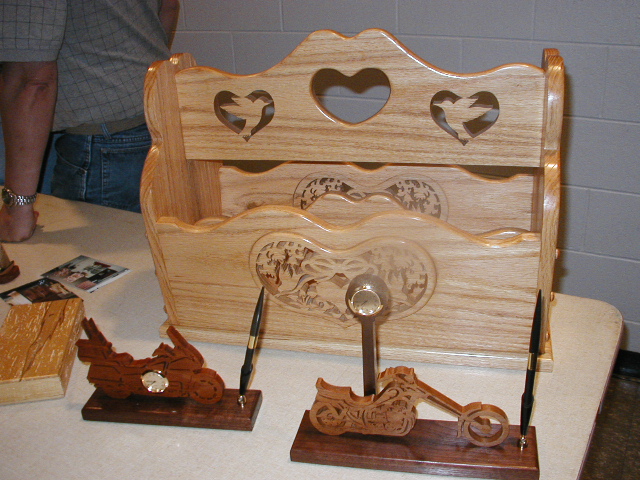
Don Helton made a magazine rack out of Red Oak
with a lot of scrollwork on it. He also brought in two scrolled motorcycle
penholders one was Mahogany with a walnut base and the other was Cherry and
Walnut.
Sycamore
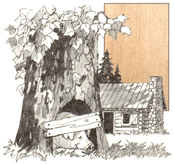 The hardwood giant of the virgin forest.
Although few woodworkers become acquainted with the wood of the American
sycamore (Platanus occidentalis), that wasn't always so. Back when the United
States was still a new nation, and its western frontier was just beyond
the Allegheny Mountains, sycamore was the giant of the forest. It wasn't
uncommon for pioneers in the Ohio River Valley to come upon huge sycamores.
In 1802, one growing on an island in the Ohio River measured 13' in diameter
4' above the ground. Such old, large trees were usually hollow, and thriving
despite the malady.
For some purposes, the hollowness made the tree all the more desirable. A
frontier farmer would fell the hollow sycamore, then crosscut it to appropriate lengths. By nailing on bottoms of tightly joined board, the industrious plowman had grain-storage containers. Left standing,
hollow sycamores also were handy for stabling goats, pigs, and other
livestock until a shelter could be built for them. And how many wandering
woodsmen might have found refuge in a hollow sycamore?
Although hard, tough, and resistant to splitting, sycamore posed some difficulty in drying. That's why it was used only on a limited basis for
shipping trunks, piano and organ cases, washing machine bodies, and pails. It also was the choice for countertops and chopping blocks in
butcher shops because it withstands the relentless punishment of cutting edges.
While still the largest hardwood tree of American forests, yesteryear's giants have long fallen. If you do spy an elderly sycamore, bang on it. The
trunk may resonate with historic hollowness.
Crosscut Sled
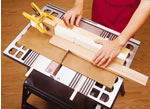
Ditch the miter gauge to increase the accuracy of your benchtop
tablesaw.
If you have zero tolerance for tear-out and inaccurate cuts,
you’ll enjoy the results you get with this
zero-clearance crosscut sled designed by WOOD® magazine reader Dan Pacht. He uses the sled to increase the precision of his benchtop
tablesaw. It replaces the wobbly miter gauge, and reduces tear-out by
closing the gap in the saw’s wide-open throat plate. You also could modify
the sled for use with a stationary tablesaw.
Start by cutting a 1/4" hardboard base to size. Now square the edges of a
pine 2x4, ripping it to 3" wide. From it, cut two 24"-long pieces, and glue
and screw them together to form an L-shaped fence assembly. Then glue
it to the hardboard base.
Next, make a pair of hardwood runners to fit your miter-gauge slots. The
runners should fit snugly but still be able to slide.
Place the runners into their slots and run a small bead of glue along each
one where the sled’s base will cover them. Center the base/fence
assembly side-to-side on your saw’s table. Square the sled’s fence to the
saw blade by placing a framing square against the fence face and along
the face of the blade. Allow the glue to dry.
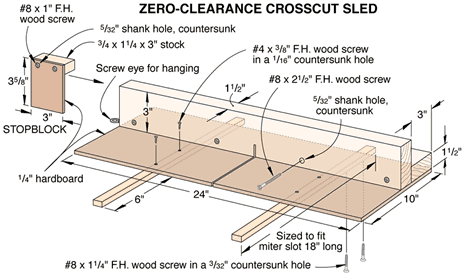
Drill countersunk pilot holes in the base, and drive screws through it into
the runners. Turn the sled over, and screw each runner into the
base/fence assembly. Add a screw eye at one end of the fence so the sled
can hang when not in use.
Note: This sled is designed for 3/4"-thick stock. To safely cut thicker
stock, add a 1-1/2x3x4" block behind the fence, aligned with the saw kerf,
to encase the blade.
Finally, make the optional stopblock if you wish, and you’re ready to go.
Simply place the runners into the slots, and raise your blade 1-1/4" above
the saw table. Glide the sled forward until the top of the blade cuts into the
fence and then back out of the cut. Now crosscut your workpiece.
For Sale:
Heavy duty wood turning lathe, 18 3/4" swing, 35" between centers, made by J.A.
Fay in Cincinnati in early 1900's, on heavy timber frame, 3/4 hp single phase
motor, 3 different length tool rests, two faceplates, can be rigged for outboard
turning, labor intensive, not for sissies, $250.
Jim Van Cleave 455-8150

WEB SITES of
INTEREST
American Association of Woodturners
Scott
Phillips Video Help sessions
Arrowmont School
of Arts and Craft
Doyle
McConnell's page
Loyd
Ackerman's Page
WOOD
ONLINE newsletter
Falls
Mill
Appalachain
Center for the Arts
Forest
Products Lab. 1999 Wood Handbook
Woodworker's
Journal
WOOD
Online TVWW page
Kevin's Woodturnings
The Oldham Company
The Woodworker's Choice
Russell Brown's Web Page


The
Leitz Tooling Systems has moved to Muscle Shoals, AL but will still do the
sharpening. The blades will have to be shipped UPS
as the salesman
doesn't call on me as much now that the company has moved. This cost will
have to be passed along. Sorry.
Call (393-0525) or stop by for details.

10 % OFF Fine Woodworking
Books from
Taunton Press
…We’re open Monday thru Saturday
Webmaster:
Tom Gillard Jr.

 Vol. 17/ Issue
10 October
2002 Editor: Tom
Gillard Jr.
![]()
![]()
![]()


 The hardwood giant of the virgin forest.


